Home/Blog/Mastering the Atomic Age: A Deep Dive Strategy Guide to Nucleum
01 Feb 2026
Mastering the Atomic Age: A Deep Dive Strategy Guide to Nucleum
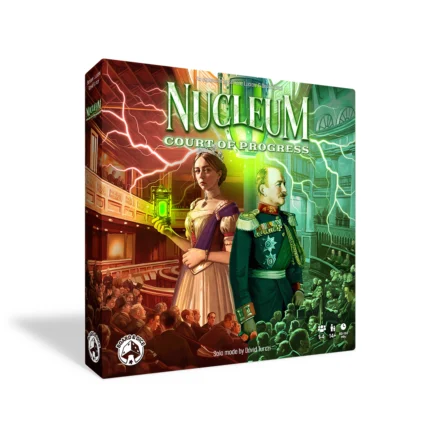
With a crushing 4.19 complexity rating on BoardGameGeek, Nucleum is not a game you simply “play” – it is a game you master. Designed by heavy Euro legends Simone Luciani and Dávid Turczi, it offers a tightly woven economic puzzle where a single inefficient turn can cost you the victory.
Don’t let the weight intimidate you. We created this guide to be your blueprint to efficiency. It doesn’t matter if you’re unboxing Nucleum for the first time or looking to squeeze more efficiency out of your engine. We’ll show you how to bypass the rookie mistakes and tame the game’s complexity into a satisfying win.
If you remember only one thing from this guide, make it this: You do not need to own the tracks to use them. But you must understand when you can use them.
This is the #1 rule players get wrong, and it leads to wasted actions.
For Transporting Energy (Energize Action): You can use ANY complete rail line, even your opponents’. You do not need to own a single track to send power from a distant plant to your building. Let your opponents do the heavy lifting!
For Building (Urbanize/Industrialize Action): You MUST own the network. You cannot build a Mine or Building in a city unless it is connected to your existing pieces by your rail (or you already have a piece there).
The Expert Move: Join other players, when they start a new railway, to save Workers on longer connections and expand your network. Use your opponents’ infrastructure to Energize your buildings or get coal from sources far from your own network.
The Result: You save actions, they do the heavy lifting, and you still score the points.
2. Action Economy: The “Develop” Trap
In Nucleum, turns are continuous. You play Action Tiles until you decide to Recharge.
The Trap: Beginners often play their starting tiles, recharge, play again, and recharge. They treat it like a deck-builder loop. This is a fatal mistake.
The Strategy: You must use the Develop action to buy new tiles. The goal isn’t just to have “more actions”—it is to delay your Recharge for a massive payoff.
The Income Rule: Crucially, your Income (the amount of Workers and Thalers you receive) depends directly on the number of Action Tiles you played before recharging.
More Tiles Played = Higher Income and access to better Victory Point multipliers.
Mastering the Tempo: However, don’t blindly aim for the longest run possible. Strategy is about timing. Sometimes, a “Weak Recharge” (playing fewer tiles) is the superior move. If you desperately need resources to snatch a critical spot on the map before an opponent, recharge early. It is better to take a smaller income now to “catch the wind in your sails” and maintain momentum than to wait for a massive payout when it’s already too late.
3. Energy Dominance: Coal is for Now, Uranium is for Later
Don’t get attached to one fuel source.
Early Game: Be a Coal Baron. Coal is accessible. You don’t need to mine it; you just need a connection to a coal import city (like Leipzig). However, Coal has a dynamic market price. It starts at 1 Thaler but quickly rises to 2 and 3 Thalers.
Strategy: Snatch the cheap coal early to power your first Tier 1 buildings. Force your opponents to overpay.
Late Game: Pivot to Uranium. Uranium is efficient. One Uranium cube generates 2 Electricity (vs. 1 for Coal). However, using Uranium requires setup: you need Mines to store it and Turbines to process it.
Pro Tip: Master the Turbine Unlock Order Don’t just build random Turbines. The order in which you remove them from your player board is a critical strategic choice:
2nd Turbine: Unlocks a Special Effect. Rush this if you want to build your entire strategy around a specific faction ability.
3rd Turbine: Grants immediate Electricity. This provides the tempo boost needed for early Energize actions without spending fuel.
4th Turbine: Unlocks your Level 3 Technology. This is the key to accessing the most powerful abilities in the game. Do not delay this if you rely on endgame tech!
* Experiment C Warning: If you are playing Experiment C, your Uranium generates 3 Electricity instead of 2. For you, the pivot to Uranium should happen almost immediately.
4. Railway Tactics: The “Color Match” Combo
Placing a railway tile is more than just connecting point A to point B. It is an opportunity to trigger a massive “double action.”
When you place a tile on the map to build a track, you perform the actions depicted on it IF the colors on the tile match the adjacent cities or tiles.
The Perfect Turn: Place a tile that matches colors on both ends. This allows you to perform both actions on your tile AND potentially activate adjacent actions from previously placed tiles.
The Warning: Be careful! If you match colors with an opponent’s tile, they get to perform their action too. Don’t accidentally give your rival a free “Urbanize” action just to get a small benefit yourself.
Don’t forget your Joker: You have one specific starting tile that cannot be placed on the map. It is your “emergency button” to perform any action with a 1 Thaler discount. Save this for a critical turn where you are short on cash for a Government Building.
5. Scoring: The Art of Multipliers
Nucleum is a “point salad,” but the biggest points come from Milestones and Government Buildings.
The Milestone Track When you recharge, you place a marker on the Milestone Track. The track has tiers (x1, x2, x3…).
Strategy: Don’t place markers blindly. You can only place ONE marker per tier. If the “x4” tier rewards Turbines, and you have many Turbines, you must prioritize grabbing that spot before you are forced to place your marker elsewhere.
The Nucleum Race: The first player to place a marker in a specific segment gets to place a Nucleum Token on the map. Place this token in a Power Plant closer to your mines to monopolize Uranium processing in that region.
The “Zero Space” Trade-off: If you recharge without enough Achievements to reach the first tier (or if your eligible tiers are full), you must place your marker on the “0” space. This gives you resources but costs -3 VP. Don’t avoid this space just because of the penalty. In the early game (Turn 2 or 3), trading 3 victory points for immediate resources (Workers/Thalers) is often a great deal. It allows you to build your engine faster, which will generate far more points in the long run than the 3 you lost.
Government Buildings (The Purple Buildings) These are expensive (5 Thalers or 3 Workers) but devastatingly powerful. When energized, they score VP for every building of a specific type in your network – including those owned by other players!
The “Absorption” Tactic: Build a Government Building in a dense area. Then, use your rail actions to connect to a cluster of your opponent’s buildings. Suddenly, their factories are scoring points for you.
6. Experiments Explained: Best Tactics for Every Board (A, B, C, D)
Nucleum offers immense replayability through its asymmetric Experiment boards. Each board changes your starting resources and, most importantly, your technology tree. To win, you cannot play generically – you must lean into your board’s unique strengths. Here is a tactical breakdown of how to maximize each Experiment:
Experiment A: The Aggressive Urbanist
The Focus: Building placement and variety.
The Superpower (Level 3 Tech – A7): You can perform Urbanize actions ignoring all network requirements.
Best Tactic: Don’t waste turns building rails to distant cities. Rush your Level 3 tech, then “teleport” your buildings to the most valuable spots on the map. This synergizes perfectly with your endgame scoring (Tech A8), which rewards having buildings in many different cities.
Experiment B: The Subsidy King
The Focus: Special Actions and the Milestone Track.
The Superpower (Level 3 Tech – B7): You gain access to exclusive Special Action tiles.
Best Tactic: Your tech tree rewards you for climbing the Milestone Track (Tech B8). Focus on triggering King’s Day Scoring early. Use your unique action tiles to perform “impossible” turns that combine income generation with massive expansion.
Experiment C: The Energy Tycoon
The Focus: Power transmission and Energizing.
The Superpower (Level 3 Tech – C7): You can transport Coal, Uranium, and Electricity ignoring network restrictions.
Best Tactic: Combine your wireless power with your unique Turbine ability: for you, 1 Uranium = 3 Electricity. You are essentially playing a different game where power is cheap and omnipresent. You don’t need a cohesive rail web; you just need generation and demand.
Experiment D: The Railway Engineer
The Focus: Track building and Contracts.
The Superpower (Level 3 Tech – D7): Your Railway tiles act as Wildcards on both sides, and you can fulfill a Contract every time you place a rail.
Best Tactic: You will never fail a color match again. Prioritize heavy track building to trigger double actions every single turn. Since placing rails lets you fulfill contracts, cycle through Silver and Gold contracts rapidly to bury your opponents in victory points.
Master the Game. Then Choose Your Deal.
Now that you have the blueprint for success, you need the right toolset.
Throughout February, you can pick up the Nucleum Base Game and Australia expansion at a special discount. But if you want the ultimate gameplay experience right from the start, check out our limited-time bundles.
We designed them to combine the core game, the expansion, and the most desirable promo sets into one package. While you can buy the main titles separately, choosing the Master Bundle allows you to secure the biggest discount and save over €30 compared to standard retail prices. These offers end on February 28th.
To provide the best experiences, we use technologies like cookies to store and/or access device information. Consenting to these technologies will allow us to process data such as browsing behavior or unique IDs on this site. Not consenting or withdrawing consent, may adversely affect certain features and functions.
Functional
Always active
The technical storage or access is strictly necessary for the legitimate purpose of enabling the use of a specific service explicitly requested by the subscriber or user, or for the sole purpose of carrying out the transmission of a communication over an electronic communications network.
Preferences
The technical storage or access is necessary for the legitimate purpose of storing preferences that are not requested by the subscriber or user.
Statistics
The technical storage or access that is used exclusively for statistical purposes.The technical storage or access that is used exclusively for anonymous statistical purposes. Without a subpoena, voluntary compliance on the part of your Internet Service Provider, or additional records from a third party, information stored or retrieved for this purpose alone cannot usually be used to identify you.
Marketing
The technical storage or access is required to create user profiles to send advertising, or to track the user on a website or across several websites for similar marketing purposes.